
There are two types of accounts in Windows 11. A standard account and an administrator account. Based on the account being used, Windows 11 lets the user have full or selective access to run the system and the apps. If you have an administrator account and want to know how to change the administrator name on Windows 11, keep reading.
What are the types of accounts in Windows 11?
There are two types of accounts on Windows 11- Standard user account and an Administrator account.
What is a standard account on Windows 11?
A standard account gives very limited access. A user who has a standard account cannot remove or add any file from the system. A standard user cannot alter any global settings. For any change in system settings, access to administrator controls is required.
Before we proceed further, let us know the basics of the administrator account on Windows 11.

What is an administrator account?
An administrator or admin account gives the account holder maximum control of access. The admin can control the system in whichever way he/she wants. An administrator can also control which features of the Windows can be used by the guests. This type of control is not given to a standard or a guest user.
Were you wondering how to change the administrator name on Windows 11? If you are the administrator, you can rename the administrator account. Here is how to do it.
- Go to the search box in the taskbar. Type computer management. Then select it from the list.
- You will see Local Users and Groups. Click on it to expand it.
- Select Users.
- You will see the option Administrator. Click on it and select Rename.
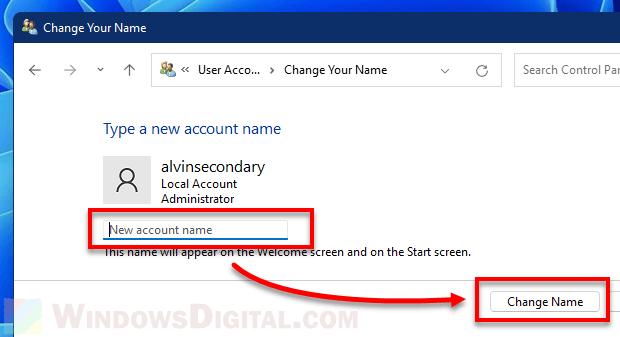
5. Type in the new name. And you are done.
Changing the name of the administrator account on Windows 11 requires a few simple steps that are fairly simple to follow. Hope you liked this article. Come back for more interesting pieces like this!